Donating My Handmade Zakka for a Good Cause ♪手作り雑貨を寄贈しました♪


Rafu Shimpo, Japanese-English daily newspaper based in Little Tokyo, Los Angeles, California, is hosting a charity golf tournament on April 7, 2014, to raise money for Nikkei (Japanese American)  community, including the Little Tokyo Public Safety Association, Nisei Week Japanese Festival, Nikkei Games: Games for the Generations, and more.

ロサンゼルスの日本人街・リトルトーキョーで日本語新聞「羅府新報」を発行する羅府新報社は、来る2014年4月7日にチャリティーゴルフイベントを開催します。イベントで得た資金は、リトル東京交番二世週日本祭り、日系人のスポーツ団体など、各種日系人団体に寄付されます。

Front page of Rafu Shimpo today. 
羅府新報の一面

Rafu Shimpo began its publication in 1903. During the World War II, the paper stopped its service for several years due to the Japanese American internment by the U.S. government. The paper resumed business after the war and the publication still continues today.

羅府新報は1903年に創刊され、現在ではアメリカ最大の邦字新聞です。第二次世界大戦中は日系人の強制収容が行われたため数年間の休刊を余儀なくされました。


 I don't play golf, nor I can't make a huge monetary donation toward the upcoming fundraiser, yet I am very honored to be able to donate my autographed books and my handmade zakka items toward this great cause. I donated everything what you see in the above pic :)  

My donations will most likely be used for the silent auction, raffle, or tournament prizes during the event, according to the friendly staff of Rafu Shimpo.  


チャリティーゴルフイベントに向けて、残念ながら私はゴルフは出来ないし、多額の寄付金を用意することもできませんが・・・。そんな中、今回羅府新報社の方からお声をかけていただいて、上記の写真にある手作り雑貨3点とサイン入り自著3冊を寄贈させていただくことができました。

寄贈させていただいた品々は、サイレントオークションの対象品や、各種賞品として使っていただくことになるそうです。大変微力ながらこのような形で普段からお世話になっている日系人の方々や日系人団体の皆さんの力になることができればとても幸せです♪ 

***Love, Amy***

What you've made from my book 2 (Crochet Doily and Linen Pouch) ♪読者の皆さんが作った雑貨をご紹介2(かぎ針編みのドイリーポーチ)


Hello everyone!

 Today I'd like to show you some of the gorgeous Crochet Doily and Linen pouches that you've made from my book, Zakka Handmades. This pouch is definitely one of my favorite projects featured in the book and I hope they are for you, too!  

Above collage: clockwise from top left  

皆さんこんにちは!今日は私の著書から読者の皆さんが実際に作って下さった「かぎ針編みのドイリーポーチ」をご紹介します♪ この作品は私のお気に入りのひとつです。上の写真:左上から時計まわりで製作者の方々はこちら↑↑


And more charming creations follow...

このほかにも可愛い作品がずらりです~。


Simple beauty stitched by Svetlana of S.O.T.A.K handmade. Love the flower button!

とてもシンプルなポーチに仕上がっているのはSvetlana さんの作品です。花柄ボタンがポイントですね。


Sweet pastel color trio made by Ms. Cyndi Dube. Cuteness overload!

こちらはパステルカラーの色使いで3点も作って下さった Cyndi Dubeさん。可愛い!


golfingbev created these pretty pouches. Look at those sweet tiny buttons...Awww!

golfingbevさんも、ご覧の通りキュートなボタンを使って2つもポーチを作って下さいました♪


Stefanie Girard of Craftside created this lovely sunglasses pouch from recycled felted sweater.  What an eco-friendly awesomeness!

Stefanie Girardさんは何と古着のセーターをフェルト化した素材でサングラスケースを作って下さいました。エコを意識した素晴らしいアイデアですね^^


To make this pouch, the doily flap is crocheted in round like this.  Check out my earlier post about the tips on crochet tension and the gauge to stitch this cotton doily.

このポーチ、まずはかぎ針編みでドイリーを編んで作り始めます。ゲージについては少し前に掲載させていただいたこちらの記事→☆を参考にしてくださいね。


Oh and don't forget to check out this post for your "Kotori bird pouches" made from my book, if you haven't yet!

皆さんが作って下さった「小鳥のポーチ」の紹介記事についてはこちらをご覧くださいね。→☆

Kotori bird pouches


Check out my Pinterest board - Zakka Handmades: my book for more projects made from my book, and...

If you're on Flickr, don't forget to post your handmade zakka projects from my book to: Zakka Handmades - the book flickr group!

Or post your zakka creations on Instagram using hashtag #zakkahandmades! You can find me as @chickchicksewing on IG.


ピンタレスト Zakka Handmades: My book→☆では著書より、今回ご紹介できなかった他作品もご覧になれます。

写真投稿サイトのFlickr→☆ に参加している方はZakka Handmadesグループにどんどん作品をアップしてくださいね。

インスタグラムを利用されている方は、ハッシュタグ#zakkahandmades で出来上がった作品を投稿してくださいね。私のアカウントは@chickchicksewingです♪

***Love, Amy***

Find me on Facebook (Amy Morinaka) →☆
Follow me on Instagram (chickchicksewing) →★


Handmade Gift Set of Side Pleated Patchwork Pencil Case and a Felt Cupcake Name Tag ♪フェルトのカップケーキと、パッチワークのペンケース♪


Hello everyone!

Today I'd like to share with you this handmade gift set I made for the sweetest girl who turned twelve recently. She is the daughter of our family friend. (Edited to Add: I was reminded by my daughter that the girl turned eleven and not twelve...oops!)

少し前に作ったものですが、11才のお誕生日を迎えた知人のお嬢さんに手作りギフトをプレゼントしました。


This cupcake name tag is made of 100% felt that I got from this online shop. I love working with 100% felt!  Hand stitched on the front side is the recipient's name...

まずはフェルトでカップケーキをちくちく。お嬢さんのお名前を表側に刺しゅうしてマスコット?名札?に仕立ててみました。 今回、フェルトはアクリル製ではなく、ウール100%フェルトを使ってみましたが、やはりウールは肌触りも使い勝手もよく、感動!ウール100%のフェルトはこちらのオンラインショップにて購入しました。→☆


For the back side, I added the "topping" with colorful rhinestones...

カップケーキの裏側には、カラフルなラインストーンで「トッピング」を。


This patchwork slim pencil case is made from my original pattern. I selected colorful scraps to stitch this one, and added a flower button for the zipper pull.

パッチワークのペンケースは、私のオリジナルの雑貨パターンを元に作っています。ファスナー飾りには、お花のボタンをつけてみましたよ。


You can find this pattern in my shop.

オリジナルパターンはオンラインショップにて販売中です。→☆


Actually the gift was two months late (sorry!)... But I hope the birthday girl liked my gift set!

実はお誕生日から2ヶ月以上も遅れてのプレゼントとなってしまい、すっかりお待たせしてしまって申し訳なかったのですが・・・><;どちらも普段使いに使ってもらえたら嬉しい限りです♪

***Love, Amy***


Simple crocheted corsage for the graduation ceremony ♪次女の卒業式用に簡単コサージュを作りました♪


This week, I made myself this simple crocheted corsage to wear at my youngest daughter's Saturday Japanese school graduation ceremony. Ceremony is scheduled early tomorrow morning.

明日、土曜日は次女の日本語補習校(小学校)卒業式です。自分用に簡単なコサージュをかぎ針編みで作ってみました。


The Saturday language school (elementary school) is held only once a week and it's not our daughter's regular "full time" school, but the graduation ceremony is still a big day for our entire family. Getting up early and sending our kids to language school every Saturday morning for the past six years was quite a challenge for all of us! (Not to mention the heavy homework load  that we had to tackle every Friday nights...)

週に一度(土曜日)だけの日本語補習校なので、卒業式といっても本来の小学校卒業式とは少し違うかもしれません。とはいえこの6年間、毎週土曜日朝に親子で早起きをして次女を日本語学校に通わせ続けるには苦労もいろいろとありました(涙)。次女は平日は現地校(英語)に通っているので、毎週金曜日の晩は翌日の日本語学校の宿題をこなすのがなかなか大変で、漢字テストの勉強も親子で頑張りました・・・。(高学年になってからは自分でこなしていましたが)。


Anyways let me quickly show you some images of this simple corsage making process...

というわけで、今日も簡単に写真をご紹介させてくださいね。


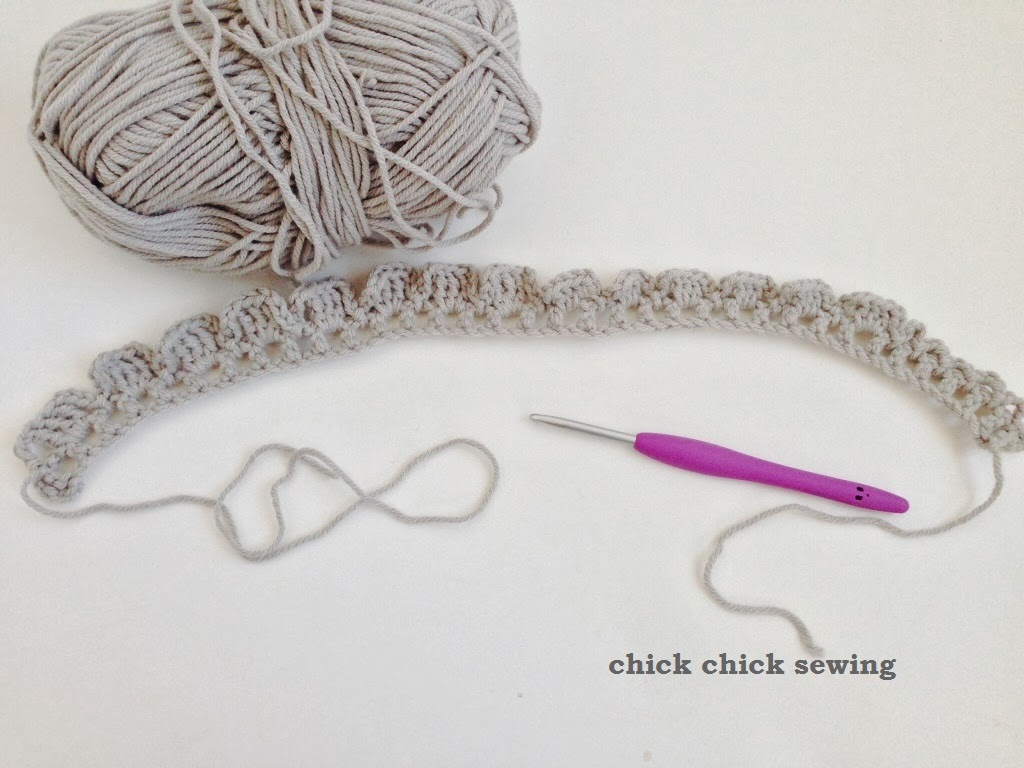
I did not follow any pattern to make this one. I played around with the yarn a bit using only the simple stitches of chains, single crochets, double crochets, and trebles to make this one.


このかぎ針編みのコサージュ、鎖編みと細編み、長編みと長々編みを組み合わせて適当に作りました^^; 長く編んだものをくるくると編みとめて、こんなふうにお花にしました。


Hoping that tomorrow will be a happy day for all of us... Enjoy your weekend!

明日も良い日になりますように・・・。皆さんも素敵な週末をお過ごしくださいね。

***Love, Amy***


How I made the Sunflower Dresden Mini Quilt ♪ドレスデンプレートで向日葵(ひまわり)のミニキルト♪


Does this dresden plate look like a sunflower to you?  Hope so!

I made this "Sunflower" mini quilt for my outstanding Japanese calligraphy instructor, or my Sensei.  She runs a popular Japanese calligraphy class called "Himawari Shuji" or Sunflower Calligraphy class here in Southern California.

例によって、すきま時間をちまちま使って向日葵(ひまわり)のミニキルト/壁飾りを作りました。このミニキルト、私がここ数年お世話になっている書道の先生にプレゼントするために作ってみました。先生は「向日葵習字」という人気書道教室をここカリフォルニア州で運営されています。


I basically followed this awesome tutorial to make this dresden mini quilt, with some changes made here and there.

Today I'd like to show you the images of how I made this mini quilt in a flash! Some pics are a bit darker than others, as most of the stitching (and smart phone photo shooting) were done in the middle of the night but hope you don't mind the quality of the photos ;P

今回のドレスデンプレートのパターンは少し自己流にアレンジしたものの、全体的にはこちらの作り方を参考にさせていただきました。→☆ 制作中にはスマホで写真を撮ってみたので以下ご紹介させてくださいね。夜中に室内で撮影した写真はどうしても暗めになってしまいましたがどうかご了承下さい^^;


I chose happy colors of orange and yellow from my stash to create dresden pieces, or petals of sunflower.

まずは黄色やオレンジの明るい生地を中心にドレスデンプレートのピース(向日葵の花びら部分)をカットします。


This dresden template was used to cut out pieces. So quick and user friendly!

私は今回このテンプレートを使ってみましたが、とっても使いやすくて時間短縮できたのでおススメです。


The pieces were chain-stitched to save both time and thread. 1/4" seam allowances are used throughout this project.

カットしたピースはミシンを使ってチェーンピーシングという手法でどんどんつなげていきます。チェーンピーシングをすることによって時間と糸の節約が同時にできます^^(縫い代は全体を通して0.7mmです)。


Then I cut them out in pieces (or wedges) and turned the wedges like this. All seams are pressed open.

つながっていたピースをひとつずつカットして先端部分を表に返し、縫い代をアイロンかけします。


For me, chopstick is always the best tool for making pointed corners!  lol

角をきれいに出したいとき、私はいつもお箸を使います(笑)。


There are a total of twenty wedges.  After arranging the fabric layout, five wedges are machine-stitched together into four sections (5 wedges x 4 parts = 20 wedges).  Then all sections are sewn together to create a full circle.

花びら部分は全部で20枚あります。布の配置が決まったら、花びらを5枚ずつミシンでピーシングして、このように4つのパーツを作ります。


Tada! Here I have a circle "plate" with all seams pressed open.

4つのパーツを縫い合わせるとドレスデンプレートの形が出来上がってきました^^ ついついニンマリしてしまう瞬間です♪


For the inner circle of the sunflower, I picked up a small plate from our kitchen that measures approximately 6 1/2" (16.25 cm) diameter.

ドレスデンプレート(向日葵)の中心部分は家にあった小皿を使ってカットしてみました。小皿のサイズは直径約16.25センチ大です。


I cut out two circles from the plate, for the front and back fabrics. Right sides together, both pieces are stitched together in round.

カットした2枚の円を中表に合わせて周りをぐるりとミシンでステッチ。


Using a pair of sharp scissors, I cut out an opening in the center. After making small notches (cuts) around the circle, press flat and turn the circle inside out. 

その後、はさみで中央部分に切り込みを入れ、円の周りには小さなノッチ(合印)の切り込みを入れます。中央の切り込みから円を表に返します。


Because my sewing machine does not have a zig zag stitch function, I decided to applique the dresden onto the background fabric by hand.

出来上がったドレスデンの花びら部分を土台布に縫いつける際にはミシンのジグザグステッチや、アップリケステッチを使うと便利ですが、あいにく私のミシンは直線縫いしかできないので^^;アップリケ作業は手縫いで行いました。


Of course, the hand stitching part was done in my car while I waited for our girls' schools and after school activities.  My car is my hand stitching station! 

例によってミシンを使わない手縫い作業は車の中で^^ 娘達の学校や習い事の待ち時間中のちくちく作業はほんの短時間でも集中できるのではかどります。


After layering the quilt top onto the batting and the backing fabric, I carefully pinned all layers together and quilted three layers of fabric together using the walking foot of my sewing machine.

その後、全体のキルティング作業は家に戻ってから(笑)ミシンでダダーと仕上げました。向日葵をアップリケをした土台布→キルト芯→裏布の順に重ねた生地を待ち針で留めてから一気にミシンでキルティングしました。ミシンの「上送り押さえ」=ウオーキングフット=を使うとキルト作業が楽々です♪


And here's how I made quick loops to hang the mini quilt.  I cut out three scraps of binding fabric into 5" x 2 1/2" (12.5 cm x 6.25 cm) small rectangles.  With right sides facing, fold rectangles in half lengthwise and stitch along the long edge.

ミニキルトには、棒を通すための筒状のフックを3つ縫い付けてみました。作り方は、12.5センチx6.25センチ大の長方形をパイピングと同じ生地から3つカットし、中表に二つ折りにして縫い合わせます。


Using loop turner, turn the tube right side out. 

ループ返しなどを使って表に返します。


 Press and topstitch along both long edges.  Fold straps in half widthwise and stitch the raw edges together.

アイロンで押さえてから、両端をステッチ。二つ折りにしてパイピングを縫いつけるときにフックも一緒に手まつりで縫いつけました。


Close up of hanging loops.

近くで見るとこんな感じです。


And this is the backing. I love this cheerful bird chirping fabric!

キルト裏側には小鳥のさえずり(?)プリントを使ってみました。


The Dresden Sunflower Mini Quilt is finished!

ドレスデンプレートで作った向日葵のミニキルトの完成です。


Unfortunately, my schedule is too crazy now that I can not continue taking the Japanese calligraphy lessons any longer... but I hope my dear Sensei (instructor) likes this sunflower gift from me :)

Thank you for following along this photo heavy post!  I really enjoyed making this Sunflower dresden mini quilt that I am looking forward to make another one soon!

かれこれ5年ほどお世話になった書道教室ですが、私の仕事が多忙になってしまったためこれ以上続けられなくなってしまいました。 とても残念で仕方ありませんが...先生にはこれまでの感謝の気持ちをこめて作らせていただきました。

書道教室には少々派手すぎる出来になってしまったかもしれませんが(汗)。とても楽しく作ることができたので、先生にも気に入ってもらえると嬉しいです。 それにしてもドレスデンプレートのアップリケは楽しくてすっかりハマりそうです~♪

***Love, Amy***


LinkWithin

Related Posts with Thumbnails